Most website owners think about security only on the day something breaks. A customer says your link opened a strange page, Google shows a red warning screen in place of your homepage, or your hosting company suspends the account with a short email and no clear reason. By that point the damage is done, and cleaning it up takes far more time and money than preventing it would have.
A regular security audit is how you catch these problems while they are still small. It does not need a big budget or a security team. It needs a clear list, a few free tools and around an hour of your time each month.
We put this checklist together from the same checks our own tools run every day. Each point explains what to look for, why it matters and how to test it yourself, starting with the basics and moving towards the problems most people miss.
What Is a Website Security Audit?
In simple words, a website security audit is a planned review of everything that could let an attacker in or let harmful code out. It looks at the software your site runs on, the people who can log in, the way data travels between your server and your visitors, and the content that loads on every page.
Think of it like a yearly health checkup. A doctor does not wait for you to fall sick before checking your blood pressure, and a good audit does not wait for a hack before checking your plugins, passwords and certificates. The aim is to find weak spots while they are cheap and easy to fix.
An audit is different from a single malware scan. A scan tells you whether something bad is on the site right now. An audit asks the bigger questions: how could it get there, who has access, what happens if the server fails tomorrow, and does Google already see a problem that you have not noticed yet?

Why Hackers Target Small and Medium Websites
When we speak with site owners, one reply comes up again and again: “My site is too small for anyone to bother with.” Sadly, attackers rarely choose websites by hand. Automated bots scan huge numbers of sites around the clock, looking for an old plugin, a weak password or a forgotten test page. When a bot finds one, the size of your business makes no difference to it.
A hacked small website is still valuable to an attacker. It can host spam pages that sell fake products, quietly send your visitors to scam sites, collect data typed into your contact forms, or join a group of servers used to attack other websites. Many owners only find out weeks later, when search traffic falls or a customer complains.
The OWASP Top 10 is a widely used list of the most serious risks for web applications, published by an open security community, and its most current edition is the 2025 version. Problems like broken access control, security misconfiguration and weak authentication sit near the top of that list, and they are the same problems a simple monthly audit can catch on an ordinary business website.
How Often Should You Run a Website Security Audit?
We suggest a light monthly routine for most business websites and a deeper review every three months. Online stores, membership sites and anything that collects personal data should lean towards checking more often, because the cost of a problem is higher.
A practical schedule looks like this:
- Every month: install updates, run a malware scan, check your SSL expiry date and look over the list of users.
- Every three months: go through the full checklist, test a backup restore and review your security headers and file permissions.
- Straight away: after a developer or agency stops working with you, after installing a new plugin or theme, after any warning email from your host or Google, and before a big launch or sale.
Put the dates in your calendar. An audit that depends on memory usually stops happening after the second month.
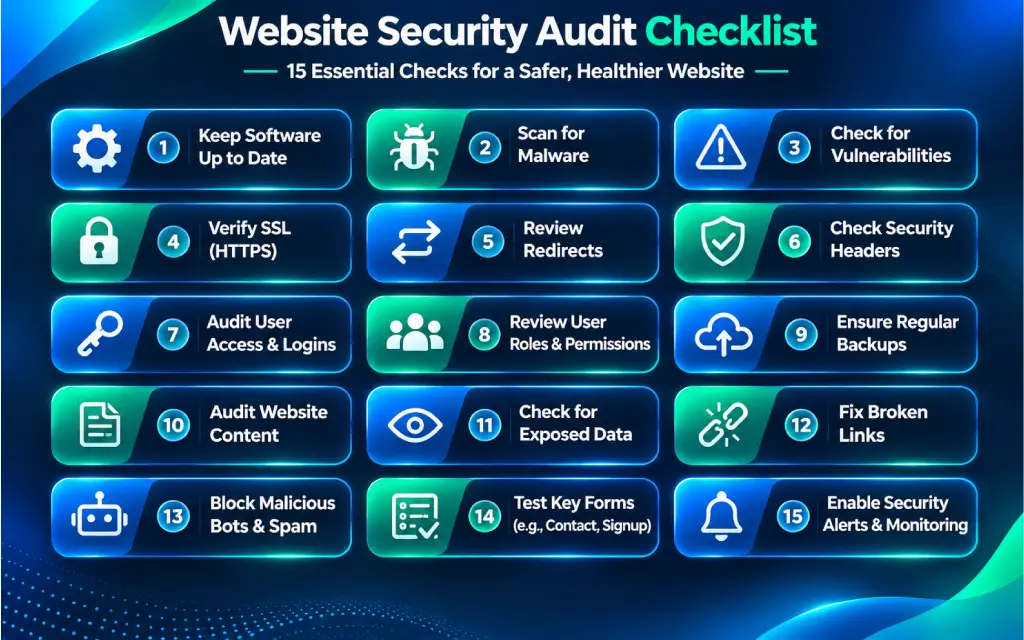
The 15 Point Website Security Audit Checklist
We have arranged the checks in the order we follow ourselves. First comes the software, then the warnings other people may already see, then the connection between your site and your visitors, then logins and files, and finally the content on your pages. You can pause after any check and come back to it later, but try not to skip the first five, because they cover the doors attackers usually try first.
1. Update WordPress Core, Plugins and Themes
When we look at a site that has been hacked, the Updates screen is the first place we open. Old software is the most common way in. Once a developer releases a fix for a security hole, the details of that hole become public, and bots start looking for sites that still run the old version.
Go to Dashboard and then Updates in WordPress, and install everything that is waiting: the WordPress core, every plugin and every theme. Then look at the plugins you no longer use. Deactivating a plugin is not enough, because its files still sit on your server and can still be reached. Delete anything you do not need, including old themes, and keep one default theme as a backup.
Next, open each plugin’s page on WordPress.org and check when it was last updated. A plugin that has not seen an update in a year or more may be abandoned, and abandoned plugins do not get security fixes. Look for a well maintained alternative and switch before it becomes a problem.
If you manage a busy store or a site with many plugins, test updates on a staging copy first. Our WordPress site audit plugin lists plugins that need an update and flags ones with compatibility problems, which makes this step quicker on larger sites.
2. Scan Your Site for Malware and Injected Code
A lot of the malware we see does not break the site at all. The pages load normally for you, while a hidden script redirects mobile visitors to a scam page or loads a cryptocurrency miner in the background. That is why a clean looking homepage is not proof of a clean website.
Malicious code usually leaves traces in the page source. Watch out for hidden iframes, long strings of scrambled text, functions like eval() and base64_decode, and scripts loading from domains you do not recognise. Attackers also leave backdoor files with harmless sounding names, which let them get back in even after you change your passwords.
Our free website virus checker scans your homepage HTML and inline JavaScript for hidden iframes, eval() calls, Base64 decoding and document.write(), and it flags external scripts and iframes that load from outside a list of well known services. It also checks whether common backdoor file names exist at the root of your domain.
Keep in mind that any outside scanner can only read what is public. For a deeper check, run a scan from inside the server as well, either through a WordPress security plugin or your hosting panel. Pay special attention to PHP files inside your uploads folder, since that folder should normally hold only images and documents.
3. Check Whether Google Has Flagged Your Site
One of the hardest calls we get from site owners starts with “My visitors are seeing a red screen.” Google and most browsers keep a list of unsafe websites, and once your site lands on it, Chrome, Firefox and Safari show a full page warning before anyone can reach you. Traffic can fall almost overnight.
You can look up your domain on the Google Safe Browsing site status page. It tells you whether Google currently considers the site unsafe and, in many cases, what kind of problem it found. If you have Google Search Console set up, open the Security and Manual Actions section and then Security Issues for more detail on your own property.
If your site is flagged, clean it first, then ask for a review from inside Search Console. Asking for a review before the cleanup is finished usually leads to a rejection and a longer wait. If your domain sends emails, check the major email blacklists as well, because a hacked site is often used to send spam that gets your domain blocked.
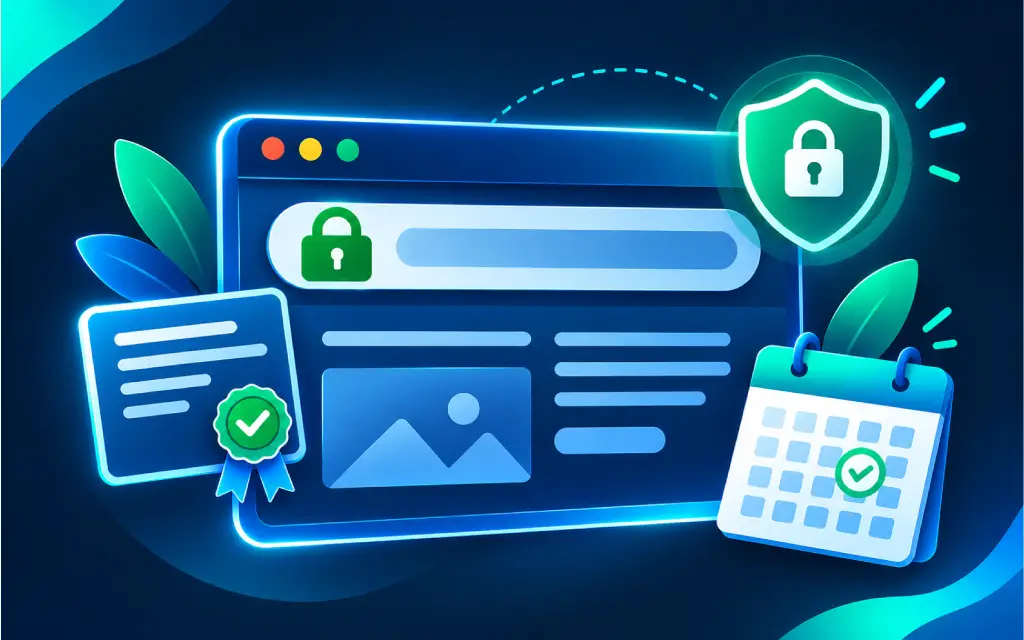
4. Verify Your SSL Certificate
Many people treat the padlock in the address bar as a sign that a site is fully secure. It only means the connection is encrypted, and even that protection disappears the day the certificate expires or is set up incorrectly. We have seen plenty of sites lose sales for a weekend because an automatic renewal failed without anyone noticing.
A proper SSL check looks at more than the padlock. You want to know when the certificate ends, whether it covers both the www and non www versions of your domain, whether the full certificate chain is installed and whether the server still allows outdated TLS versions.
Our free SSL checker reads your certificate straight from the server and shows the days remaining, with a warning under 30 days and a problem flag under 14 days. It also lists every domain on the certificate, checks that the chain is complete, warns about outdated TLS versions and tests whether plain http requests redirect to https.
Set a calendar reminder two weeks before every expiry date, even if your host renews certificates automatically. A reminder costs nothing and catches the rare renewal that fails.
5. Force HTTPS Everywhere and Fix Mixed Content
An SSL certificate does little if your site still answers on plain http. We often find sites where the homepage redirects correctly but older blog posts, images or the www version still load without encryption.
Your domain can be typed in four ways: http with www, http without www, https with www and https without www. All four should end up at one secure address, ideally in a single redirect. Long chains of redirects slow the page down, and a broken step in the chain can leave visitors on an insecure version.
Test each of the four versions with our redirect checker and look at every hop between the address you typed and the final page. If something lands on http, fix the site address in Settings and then General in WordPress, and ask your host to set a server level redirect.
Then look for mixed content, which means images, scripts or styles loaded over http on a page that is served over https. Browsers block some of these files and show a warning for others. Update old links in your content with a search and replace tool, and remember that a script loaded over http could be swapped for something harmful on the way to your visitor.
6. Add the Right Security Headers
Security headers are short instructions your server sends to the browser along with every page. Most visitors never see them, yet they block whole groups of attacks, and in our experience they are among the most commonly missing items on small business websites.
Six headers are worth checking:
- Strict-Transport-Security tells browsers to always use https on your site, even if someone types http.
- X-Content-Type-Options stops browsers from guessing file types, which blocks some file upload tricks.
- X-Frame-Options stops other sites from loading your pages inside a hidden frame to trick people into clicking.
- Referrer-Policy controls how much of your page address is shared when someone clicks a link to another site.
- Permissions-Policy decides which browser features, such as the camera or location, your pages are allowed to use.
- Content-Security-Policy lists the sources your pages may load scripts and styles from, which limits the damage injected code can do.
Our HTTP header checker reports which of these six headers your site sends and which are missing. It also flags version numbers shown in the Server or X-Powered-By headers, which give attackers a free hint about what software you run.
You can add headers through your hosting panel, your .htaccess file, a service like Cloudflare or a security plugin. Add Content-Security-Policy last and test it carefully, because a strict policy can stop your own scripts, analytics or payment forms from working.
7. Lock Down Your Login Page
Your login page is the front door, and bots knock on it all day. When we check login logs on ordinary small sites, it is common to find repeated failed attempts from many different IP addresses within a single day.
Start with passwords. Every account should have a long, unique password stored in a password manager, and nobody should reuse a password they use for email or social media. Next, turn on two factor authentication for every administrator, which means a code from a phone app is needed along with the password.
Then make guessing slow and expensive for bots. Limit the number of failed login attempts before an address is blocked for a while, never use “admin” as a username, and consider moving the login page to a custom address. Changing the address is not real protection on its own, but it cuts down the noise from automated bots a great deal.
8. Review User Accounts and Roles
Every audit we run includes a slow scroll through the Users screen, and it often turns up something: a developer who finished a project two years ago, an intern who left, or an agency account nobody remembers creating. Each of these is an open door with a key you no longer control.
Open Users in WordPress and sort by role. Remove anyone who no longer works with you, and lower the role of people who do not need full control. A writer needs the Author or Editor role, not Administrator. The fewer administrator accounts you have, the fewer accounts an attacker can use to take over the whole site.
Pay close attention to administrator accounts you do not recognise, especially ones with odd usernames or email addresses. A new administrator that nobody created is one of the clearest signs of a hacked site. Check the email address on each admin account as well, since password reset links go there.
9. Test Your Backups by Restoring Them
Most site owners we speak with say they have backups. Far fewer have ever tried to restore one. A backup that fails on the day you need it is no better than no backup.
Good backups cover both the files and the database, run automatically, and are stored away from your main server. If your backups live on the same hosting account as your website, a hacked or failed server can take both with it. The common 3 2 1 rule is a helpful guide: keep three copies of your data, on two different kinds of storage, with one copy offsite.
Keep older copies too. Malware can sit quietly on a site for weeks before anyone notices, and if you only keep the last three days of backups, every copy may already be infected. Thirty days of history is a sensible minimum for most business sites.
Once every three months, restore a backup to a staging site and click through it. Check that pages, images, forms and the checkout all work. This one test tells you more about your safety than any report.

10. Turn Off File Editing and Check File Permissions
If an attacker gets into an administrator account, the built in theme and plugin editor in WordPress lets them change your code straight from the browser. Most sites never use this editor, which makes it a risk with no benefit.
You can turn it off by adding this line to your wp-config.php file: define( ‘DISALLOW_FILE_EDIT’, true ); Your developer can still change files through hosting or FTP, but a stolen login can no longer be used to rewrite your theme in a few clicks.
File permissions decide who can read and change files on the server. A common safe setup is 755 for folders and 644 for files, with wp-config.php set tighter, such as 640 or 600, depending on what your host supports. Permissions like 777 let anyone on the server write to a file and should never be used on a live site.
While you are in your files, hide information that helps attackers. Remove the readme.html file that shows your WordPress version, make sure your uploads folder does not list its files when opened in a browser, and stop your theme from printing the WordPress version in the page source.
11. Look for Hidden Spam Links and Content
Some of the trickiest hacks we deal with are invisible to the site owner. Attackers add hundreds of links to casino, pharmacy or loan sites inside your pages and hide them with CSS. Visitors see nothing, but search engines read every link, and your rankings and reputation pay the price.
A quick first test is to search Google for site:yourdomain.com along with words like casino, viagra, loan or replica. If pages you never wrote show up, your site has been used for spam. Some hacks also show spam only to Googlebot, which means your pages can look clean in your own browser while search results tell a different story.
Our hidden element checker scans the page you enter plus up to 8 internal pages linked from it, and flags anything hidden with display:none, visibility:hidden or zero opacity. Some hidden elements are normal, like menus and accordions, and the tool cannot tell those apart from injected spam, which is why you should review each result yourself.
12. Fix Broken Links That Attackers Could Take Over
Broken links look like a small SEO issue, but some of them carry a real security risk. When a website you link to shuts down and its domain expires, anyone can buy that domain. Spammers buy expired domains on purpose, set up harmful pages and enjoy the visitors your old links still send them.
Run your site through our broken link checker and look closely at outbound links that fail. For each one, either update it to a working source, link to an archived copy, or remove it. Fix broken internal links as well, since they waste crawl time and frustrate visitors.
Pay extra attention to links inside old blog posts, footers and resource pages. These pages are rarely checked, and they are where dead links tend to pile up.
13. Check robots.txt and Your Sitemap for Leaks
We often find robots.txt files that point straight to private areas, with lines like “Disallow: /old-backup/” or “Disallow: /staging/”. The robots.txt file is public. Anyone can open it, and listing a folder there tells attackers exactly where to look.
Robots.txt is only a polite request to search engines, not a lock. Anything private should be protected with a password or removed from the server, not just hidden from crawlers. Use our robots.txt tester to see what your file says and whether it blocks pages you actually want in search.
Open your XML sitemap as well and scroll through it. It should not list test pages, staging copies, thank you pages that show order details or anything else you would not want a stranger to find.
14. Protect Forms and Comments From Spam and Abuse
Forms are one of the few places where strangers can send data straight into your website, and that makes them a favourite target. Most of the time the result is spam, but forms that accept file uploads or send automatic emails can be misused in more serious ways.
Add spam protection to every public form, either a spam filter or a CAPTCHA. If a form accepts uploads, allow only the file types you really need, such as PDF or JPG, and set a size limit. Check what your form notification emails contain, and avoid sending sensitive customer details in plain email when you can store them safely in the dashboard.
If you do not use comments, turn them off across the whole site. Unused comment sections attract spam links and add one more door that needs watching.
15. Monitor Activity and Set Up Alerts
The last check is about knowing quickly when something changes. In many hacked sites we review, the warning signs were there days or weeks earlier, but nobody was watching.
Turn on a login activity log that records who signed in and when. Set up uptime monitoring that sends an email or message when the site goes down. Make sure Google Search Console sends alerts to an inbox someone actually reads, and schedule automatic scans that email you a short report.
Finally, keep a simple record of every audit: the date, what you checked, what you found and what you fixed. A plain spreadsheet works fine. Over time it shows you which problems keep coming back, and it gives your developer or host a clear history if something does go wrong.
Website Security Audit Checklist at a Glance
Keep this table handy as a quick reference for each audit.
| Check | How often | Free tool or place to check |
|---|---|---|
| 1. Update core, plugins and themes | Monthly | WordPress Updates screen |
| 2. Scan for malware | Monthly | Virus Checker |
| 3. Check Google flags | Monthly | Google Safe Browsing, Search Console |
| 4. Verify SSL certificate | Monthly | SSL Checker |
| 5. Force HTTPS | Every 3 months | Redirect Checker |
| 6. Security headers | Every 3 months | HTTP Header Checker |
| 7. Lock down login | Every 3 months | WordPress settings or security plugin |
| 8. Review users | Monthly | WordPress Users screen |
| 9. Test backups | Every 3 months | Staging site |
| 10. File editing and permissions | Every 3 months | Hosting file manager |
| 11. Hidden spam | Monthly | Hidden Element Checker, Google site: search |
| 12. Broken links | Every 3 months | Broken Link Checker |
| 13. robots.txt and sitemap | Every 3 months | Robots.txt Tester |
| 14. Forms and comments | Every 3 months | Form plugin settings |
| 15. Monitoring and alerts | Set once, review monthly | Search Console, uptime monitor |
What to Do When Your Audit Finds a Problem
Finding a problem during an audit is a good outcome. It means you caught it before your visitors or Google did. The order in which you respond matters, though, and we have seen rushed fixes make a hack worse.
- Take a full backup of the site as it is right now, even if it is infected. It helps you or your developer understand what happened.
- Change every password linked to the site: WordPress administrators, hosting, FTP or SFTP, the database and the email account used for password resets.
- Remove the infection by cleaning the affected files or restoring a clean backup from before the problem started.
- Update WordPress, every plugin and every theme, and delete anything you do not use, since the original hole is often an outdated plugin.
- Remove user accounts and files you do not recognise, and tell your hosting company what happened. Many hosts can scan the server from their side.
- If Google flagged the site, request a review in Search Console once the cleanup is complete.
- Run the full checklist again a week later to confirm the problem has not come back.
Hacks that inject spam often leave damage in your search listings as well, such as strange page titles, changed meta descriptions or pages set to noindex. Run your main pages through our SEO analyzer after the cleanup to spot any titles, descriptions or tags that still look wrong.
Common Mistakes People Make During a Security Audit
Over time we have noticed the same few mistakes repeating, even on sites run by careful owners. Each one feels harmless, yet each one leaves a door open.
- Thinking deactivated plugins are safe. Their files are still on the server and can still be attacked. Delete what you do not use.
- Treating the padlock as proof of safety. SSL protects data in transit. It does nothing against malware, weak passwords or outdated plugins.
- Keeping backups on the same server. If the server fails or gets hacked, the backups go with it.
- Sharing one administrator login across the team. You lose track of who did what, and you cannot remove one person without changing the password for everyone.
- Running the audit once and forgetting about it. New plugin updates and new threats appear every week, which makes security a routine, not a one time task.
- Ignoring emails from the hosting company. Hosts often spot unusual activity first, and their warnings are easy to dismiss as routine notices.
Frequently Asked Questions
What should a website security audit checklist include?
A good checklist covers software updates, malware scanning, blacklist status, SSL and HTTPS, security headers, login protection, user accounts, backups, file permissions, hidden spam, broken links, robots.txt, forms and ongoing monitoring. Together these cover the most common ways attackers get into a website and the damage they leave behind.
How long does a website security audit take?
For a typical small business site, the monthly checks take around 30 to 60 minutes once you know the routine. A full quarterly review with a backup restore test can take two to three hours. The first audit usually takes the longest, because you are fixing problems that have built up over time.
Can I run a website security audit for free?
Yes. Most of the checks in this guide use free tools or settings already inside WordPress, Google Search Console and your hosting panel. Paid services become useful when you want server side malware cleanup, a web application firewall or someone to handle the work for you.
How do I know if my website has been hacked?
Common signs include a warning from Google or your browser, redirects to sites you do not own, spam pages showing up in Google search results, new administrator accounts you did not create, sudden drops in traffic, and warning emails from your host. Some hacks show no visible signs at all, which is why regular scans matter.
Is an SSL certificate enough to keep my website secure?
No. An SSL certificate encrypts the connection between your site and your visitors, which protects data while it travels. It does not stop malware, weak passwords, outdated plugins or spam injections. SSL is one item on the checklist, not the whole checklist.
Do I still need to check security if my host offers protection?
Yes. Hosting security protects the server, but it usually cannot see inside your WordPress setup, your user accounts or your plugins. Many website hacks happen through the site itself, such as an outdated plugin or a stolen password, which falls outside what most hosts monitor.
Make Website Security a Monthly Habit
Website security does not depend on one big fix. It comes from a handful of small checks done regularly: updating software, watching who has access, keeping backups you trust and noticing changes before your visitors do. Sites that follow a routine like this one rarely end up in an emergency, and when something does go wrong, they recover in hours instead of weeks.
Pick a date this month, open this website security audit checklist and work through the first five checks. Next month, add the rest. After two or three rounds, the whole audit will feel as routine as checking your sales report.
Want a quick starting point? Our free Full Site Audit checks your page for injected code, backdoor files, SSL, security headers, mixed content and exposed WordPress details, then gives you a score out of 100 with an A to F grade and links to the right tool for each issue.